Football Speed – 7 Tips to a Faster 40
By: Patrick Beith

This is the time of the season where I am sure that you are asked the same question over and over. 'How do I run a faster 40?'
Here are the Top 7 Tips to be able to increase your 40 yard time dramatically without having to run a step. Part I will focus on the starting position in the 40 yard dash.
Starting Position

Tip 1 – Foot Placement
The start of your 40 yard is extremely important since it sets up your entire run. You want to put yourself in the best position possible to be able to explode off of the line.
You must first determine your 'quick' leg and your 'power/strong' leg. An easy way to determine your “quick” side vs. your “power” side, fold your arms in front of you. The hand that is tucked under your bicep/armpit is your quick side arm. If your left hand is tucked under, your right leg is your “quick” leg.
Your quick leg is going to be in the back position when starting in a 3-point stance and your power leg will be in front. The front leg is going to be the leg that is really starting the initial drive out so you want your strongest and most powerful leg in front.
Technically, the distance between the front foot (power leg) and the starting line should be approximately 55-60% of your leg length. The distance between feet should be shin length, which is about 42-45% of total leg length. A simpler and equally effective spacing is to start by placing front foot (power leg) two foot-lengths from the starting line and the rear foot (quick leg) another foot length between the front and rear feet. Spacing can be adjusted from there based on comfort, existing strength levels, etc.
Tip 2 – Shoulder Position at the Start
The position of the shoulders while in the starting is a subject for debate. Some coaches instruct their athletes to bring their shoulders out slightly past their hands, thus bringing the center of mass closer to the starting line. First off, at some football combines, this movement is illegal so check with an official at your combine if you prefer to use this technique.
I have found that leaning forward at the line often makes athletes fall forward at the start. So, their first step is catching and trying to control their body instead exploding out. They are actually trying to keep their feet underneath them to avoid falling forward and not creating horizontal velocity during the drive phase.
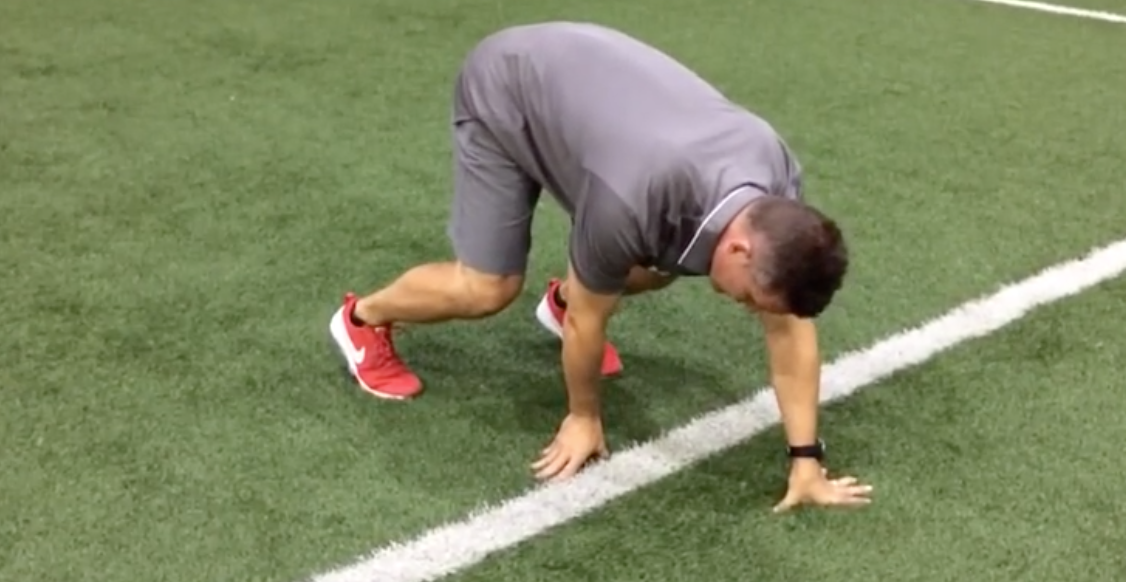
Your thumbs should be directly under your shoulders. This maximizes the distance of the shoulders from the ground. The shoulders should be directly over or slightly behind the hands. This will keep the hips from moving forward and upward on the set command. The quick side, (rear) knee should be in contact with the ground.
Tip 3– Leg Angles (Starting Position / 3-point stance)
The front knee angle should be between 90 and 110 degrees, while the rear leg angle should be between 120 and 135 degrees. Existing strength levels will be the primary factor determining whether your knee angles are closer to 90 and 120 degrees, versus 110 and 135 degrees. This means that weaker athletes will have the hips higher in the air (closer to 120 and 135).
Evidence suggests that angles in this range allow for the greatest stretch reflex in the hamstrings, as well as the greatest amount of velocity when exiting the starting line. It is important that you know your limitations. Even advanced male athletes, at the high school level, usually do not have the strength and power capabilities to successfully use lower knee angles when in the set position. A tell tale sign of poor acceleration mechanics and/or body angles is seen when an athlete becomes completely upright within the first few steps of a race. Rapidly decreasing shin angles are the most obvious evidence of limited strength and power output.
Tip 4 – Head Alignment
You have probably seen and heard many different ways to align your head while in the 3-point stance. Some coaches want you to keep your head down and looking back at your legs at the start. Other coaches believe that you should have your head up so that your eyes are looking forward. This may work on the football field since you need to see the ball snapped and know what's happening on the field, but we are looking to your body in the best 'exiting' position possible.
Your head position should be properly aligned with your spine (so it is straight). Looking down and back normally causes the athlete to break at the hips while driving out while trying to maintain that position. Also, another problem that I have seen with trying to keep the head down is that it can cause the athlete to lean too far forward while in the starting position and it causes a breaking of the hips in the drive phase.
Tip 5 – Hip Height
Hips should be above the shoulders. The degree of height above the shoulder will affect knee and hip angles, thus affecting force application and acceleration. The higher your hips the more weight you can shift to the hands.
Make sure that your hips aren't too high or you won't be able to support all the weight and your first step off of the starting line will be short almost 'catching' your body from falling. If your hips are too low, you could have too much weight back where your body can't explode as ideally as you would like to overcome inertia. Also, you are most likely to 'pop' straight up on your first step, negating your acceleration phase.
Tip 6 – Hand Placement
Hands should be placed about shoulder width apart to start. The hands should also be arched, so that only the fingertips are actually touching the ground. Doing this ensures that you will not place too much weight on your arms which forces your legs to move the majority of your body’s mass. The thumb and index finger are going to take on the majority of the weight. They will also run parallel with the starting line.
Your quick side hand is going to be the hand that is going to be left on the ground supporting during the set position. Your power side hand will be raised off of the ground. Keep the power side arm at 90 degrees with that hand by your hip. Keeping your power side arm at 90 degrees at the starting position will enable you to come through with that arm quickly when driving out. The biggest reason to keep that arm at 90 degrees at the starting position is if your 40 yard time is being timed by a stop watch and not electronically.
If someone is manually timing your 40 yard run with a stop watch, they are going on your first movement. If your power side arm is up to 120 degrees or so, it is easier to see that arm move first and it won't be as noticeable if it is kept at 90 degrees. So, it might be slight time saver, but as you know, every little bit helps.
Tip 7– Focus
Most football combines time their 40 yard runs electronically or FAT (fully automated timing). One of the easiest ways for them to time is to have the electronic timing device connected to a gun, when the gun fires, the timing starts. So, here is a tip if you are getting your 40 timed by your reaction to the gun.
There are two things you can focus on. One is to focus on a motor set, which means to focus on your first movement, not the gun. Second, would be a sensory set. This means that you would focus your attention on the starter’s gun. Focusing on the gun isn’t necessary because you are going to hear it and react to it whether you are focusing on it or not.
By focusing on a sensory set as opposed to a motor set, you are likely to get a slower reaction time to the gun. By waiting to react to the gun, you have to wait to hear the gun, and then your brain has to acknowledge the sound of the gun, and then send a signal to your muscles to react to the gun. This might only take .10, but it is time you cannot afford to waste. Instead, you should focus on driving the power side arm (if your right leg is forward, then drive your right arm) up as soon as the gun goes off. This will help bring your quick side leg through as well as help you drive through your power side leg.
Recommended Athletes' Acceleration
Products


0 Comments for “Football Speed – 7 Tips to a Faster 40”